by Julia Tran |
How to Wash Your Face with Lash Extensions Saskatoon | Étoile Lash
How to Wash Your Face with Lash Extensions in Saskatoon
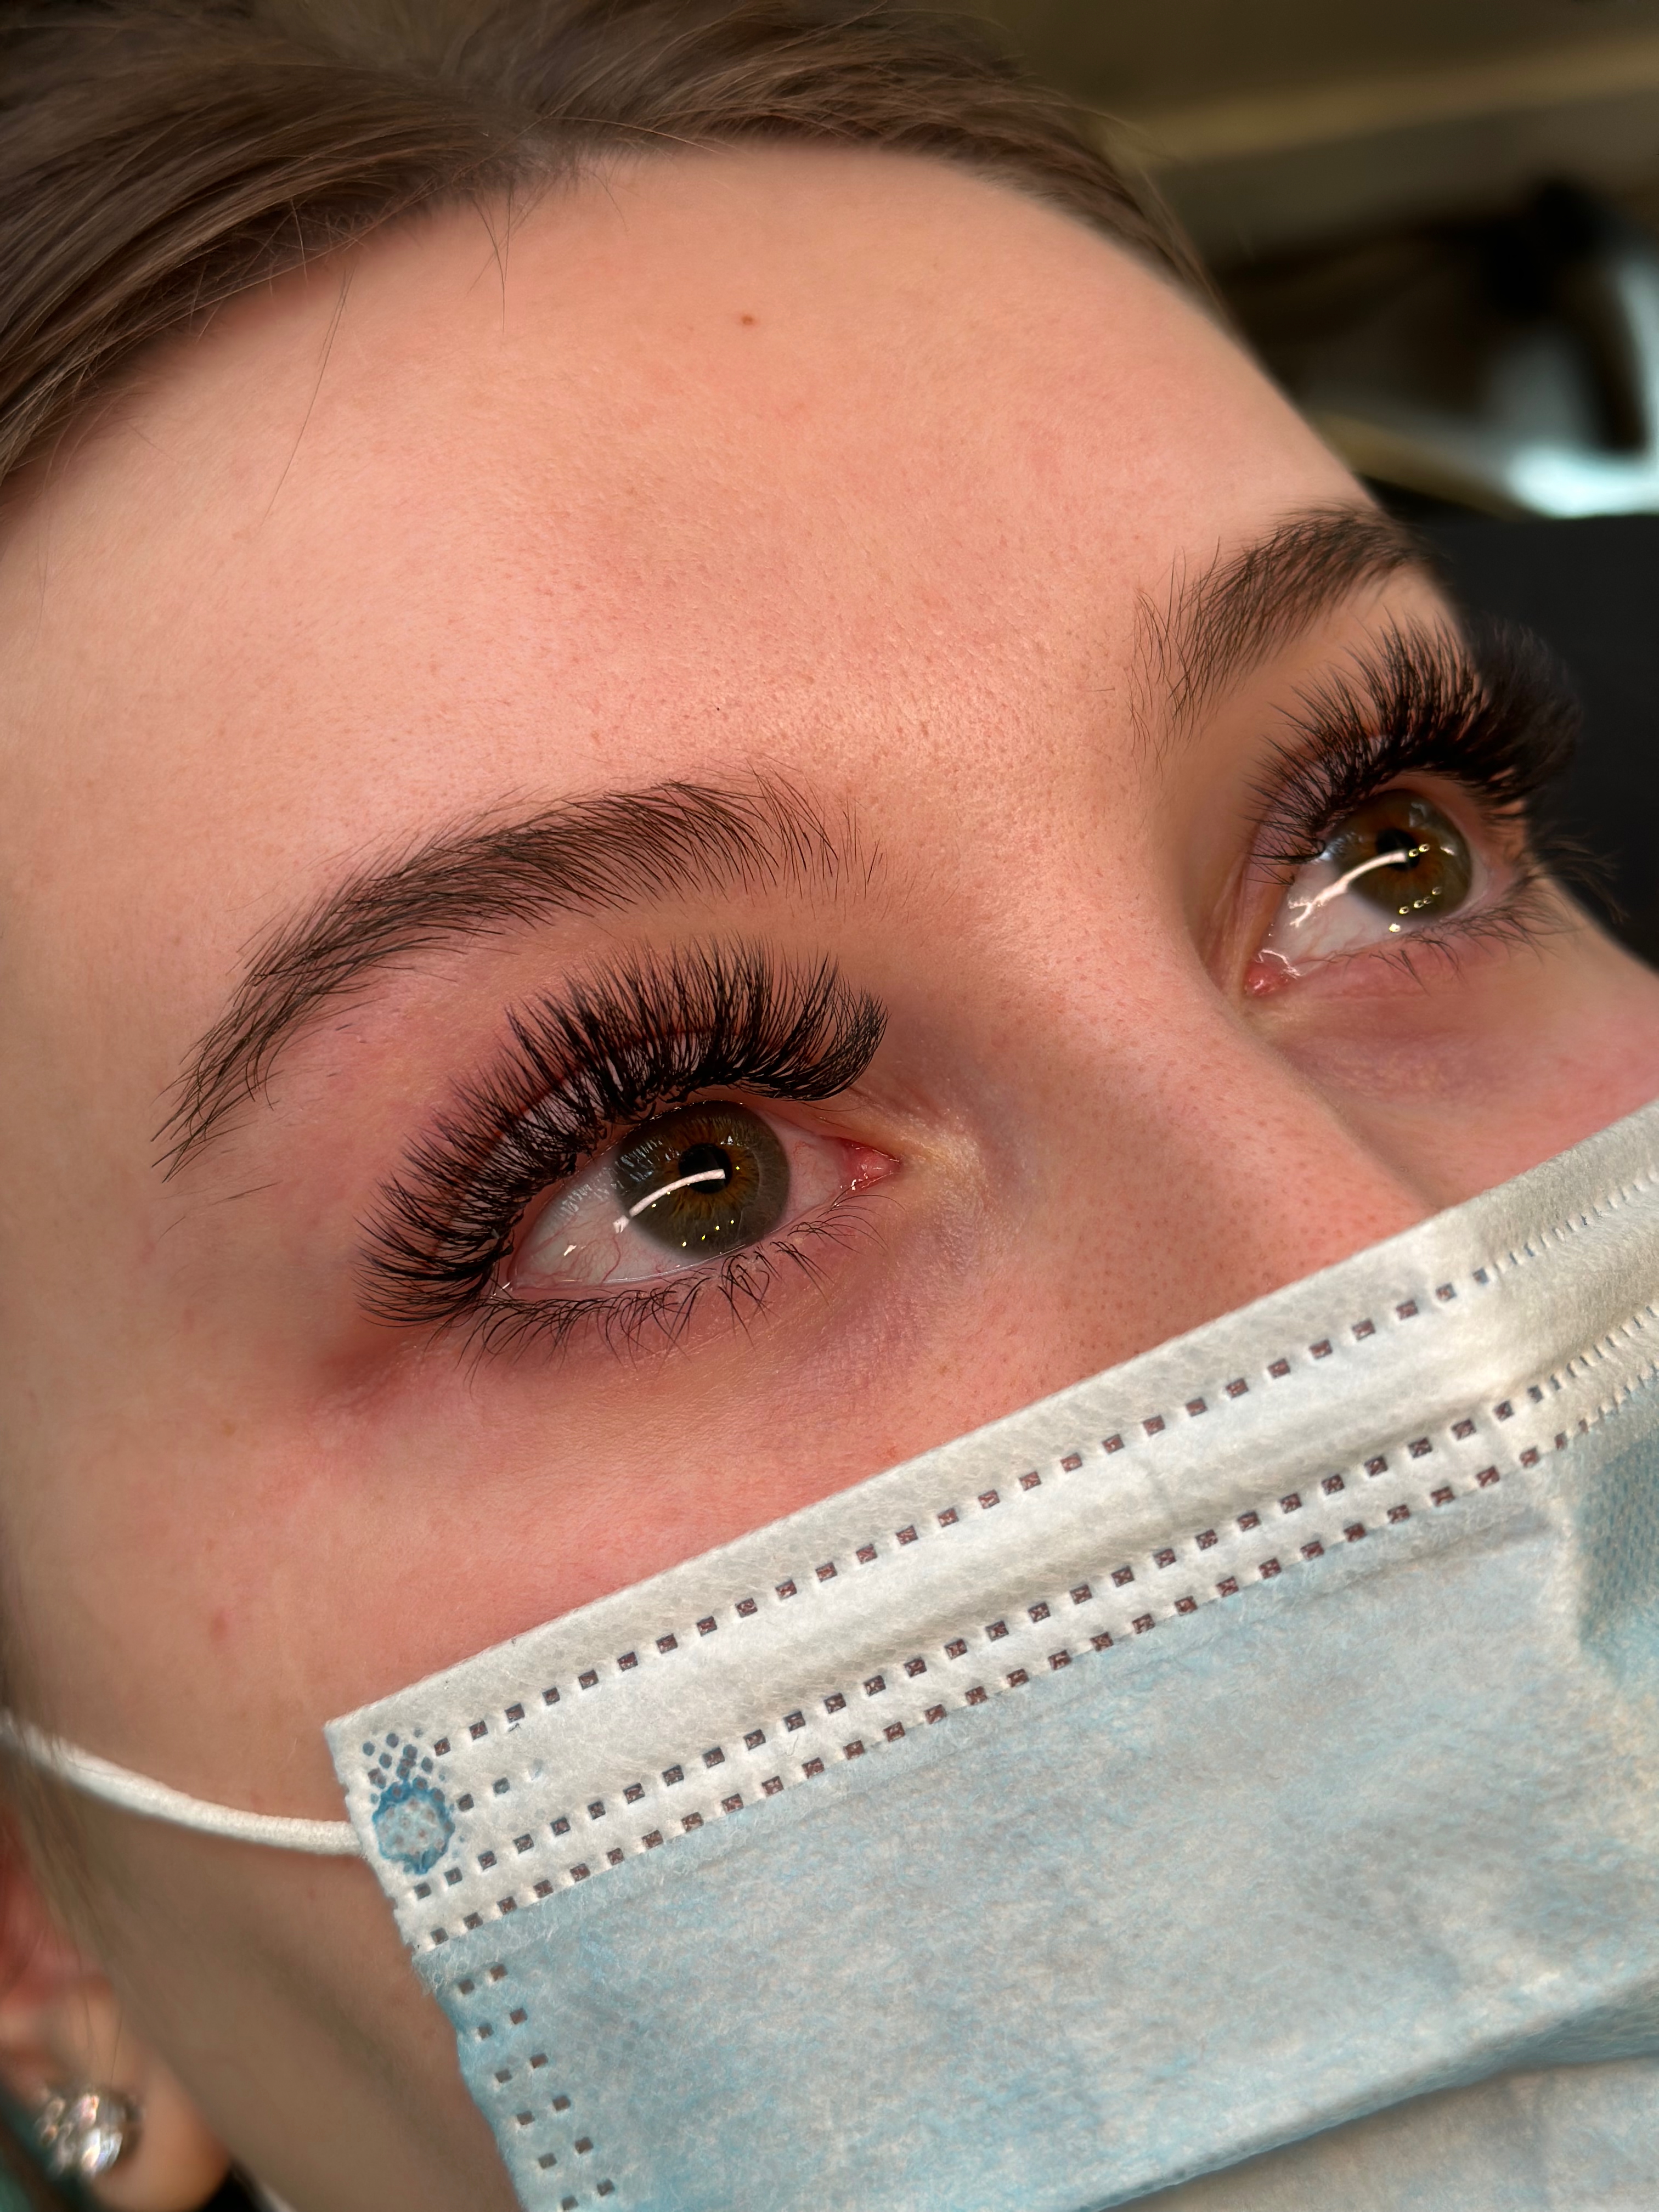
Here’s something that surprises most of my clients at Étoile Lash Studio: not washing your face is the #1 reason lash extensions fall out early. I know it sounds counterintuitive—most people think water and cleansing will damage their lashes, so they avoid washing around their eyes entirely.
But after 5+ years of doing lash extensions in Saskatoon, I can tell you with absolute certainty: clean lashes last longer. The clients who follow a proper face-washing routine consistently get better retention, fewer irritation issues, and healthier natural lashes underneath their extensions.
If you’ve been tip-toeing around your eye area during your skincare routine—or worse, skipping face washing altogether—this guide is for you. I’ll walk you through exactly how to wash your face safely with lash extensions, which products to use (and avoid), and share the step-by-step routine I teach every client who books an appointment at my Saskatoon studio.
Why You Need to Clean Your Lash Extensions Daily
Let me be blunt: dirty lashes are a problem. When you skip cleansing around your eyes, here’s what builds up along your lash line:
- Natural skin oils (sebum) that break down lash adhesive
- Dead skin cells and environmental debris
- Makeup residue, even if you don’t wear eye makeup
- Bacteria that can cause eye infections or blepharitis
- Dust and allergens (especially in Saskatoon’s dry winter air)
Real story from my studio: A client came in for her refill after 2 weeks and had lost nearly 40% of her lashes. When I examined them under my magnifying lamp, I could see visible buildup of oil and debris along her lash line. She admitted she’d been “too scared to touch them” and hadn’t washed around her eyes since her appointment.
We cleaned her remaining lashes, I taught her the proper cleansing method, and at her next refill? She’d retained over 80% of her lashes. Same adhesive, same technique—the only difference was cleansing.
The takeaway: washing your lashes isn’t optional—it’s essential for lash extension retention and eye health.
Step-by-Step: The Safe Way to Wash Your Face
Here’s the exact routine I teach every client at Étoile Lash Studio. Follow these steps, and your lash extensions will look better and last longer—I guarantee it.
Step 1: Remove Eye Makeup First
Before washing your face, remove any eye makeup using an oil-free makeup remover on a lint-free applicator. Gently press the pad against your eyelid and let the remover dissolve the makeup for a few seconds before wiping away with downward strokes.
Important: Never use cotton balls or fluffy cotton pads—the fibres catch on your extensions and can pull them out. Use lint-free pads or disposable mascara wands instead.
Step 2: Wet Your Face with Lukewarm Water
Splash lukewarm water on your face. Avoid hot water—it can weaken the lash adhesive bond, especially during the first 48 hours after application. This is particularly important during Saskatchewan winters when we all crave hot showers after coming in from -30°C weather!
Step 3: Apply Oil-Free Cleanser
Pump a small amount of oil-free, foaming cleanser onto your fingertips or a soft cleansing brush. Gently work the cleanser across your face, including your eyelids and lash line.
The key technique for your lash area: Use your ring finger (it applies the least pressure) and gently stroke downward along your lashes—from the base to the tips, following the direction your lashes naturally grow. Never scrub side-to-side or in circular motions on your lashes.
Step 4: Clean Along the Lash Line
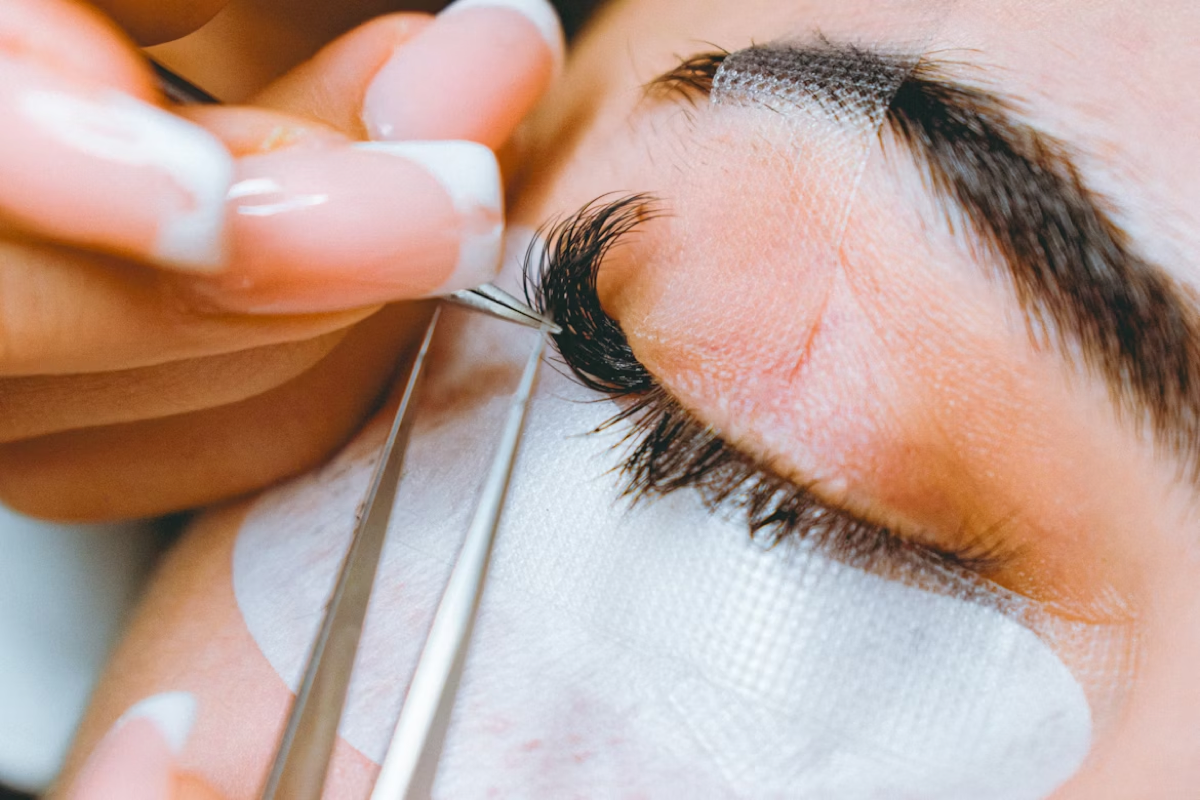
This is the step most people skip—and it’s the most important one. Using a clean, soft-bristle cleansing brush or your fingertip, gently work the cleanser along your upper lash line where your extensions are bonded. This removes the oil and debris that accumulates right at the adhesive point.
Pro tip: I recommend a dedicated lash cleansing brush (they look like soft mascara wands). They’re designed to clean between individual extensions without pulling or catching.
Step 5: Rinse Thoroughly
Rinse your face with lukewarm water, making sure all cleanser residue is completely washed away. Leftover cleanser can irritate your eyes and break down the adhesive bond over time.
Saskatoon tip: Our tap water is quite hard, which can leave mineral deposits on your lashes. If you notice a whitish residue after washing, consider using filtered water for the final rinse.
Step 6: Pat Dry (Never Rub!)
Gently pat your face dry with a clean, lint-free towel. For your eye area, lightly press the towel against your closed eyelids—never rub or drag the towel across your lashes.
Step 7: Brush Your Lashes
Once your lashes are dry (give them a minute or two), use a clean spoolie brush to gently comb through your extensions. This separates any lashes that may have crossed during washing and restores their beautiful fan shape.
Brush with downward strokes on top and gently flick upward at the tips. This finishing touch keeps your lashes looking salon-fresh between refill appointments.
Best Cleansers for Lash Extensions
Not all cleansers are created equal when you have eyelash extensions. Here’s what to look for—and what to avoid.
What to Look For
- Oil-free formulas (oil dissolves lash adhesive)
- Foaming cleansers (they rinse clean without residue)
- Gentle pH-balanced formulas (pH 5.5-7.0 is ideal)
- Lash-extension-specific cleansers (the safest option)
What to Avoid
- Oil-based cleansers (coconut oil, argan oil, cleansing oils)
- Micellar water directly on lashes (contains glycols that can weaken adhesive)
- Glycolic acid or AHA cleansers near the eye area
- Waterproof makeup remover (usually oil-based)
- Bar soap (too harsh, leaves residue)
My recommendation: A dedicated lash extension foaming cleanser is the safest bet. They’re specifically formulated to clean extensions without compromising the adhesive. If you don’t have one, a gentle, oil-free face wash works—just double-check the ingredients for hidden oils.
If you’re using retinol or getting facials, be extra careful about product migration toward your lash line, especially at night.
How Often Should You Clean Lash Extensions?
Daily cleaning is the gold standard. I tell all my clients to clean their lash extensions at least once a day, ideally in the evening before bed.
Here’s my recommended schedule based on skin type:
Normal Skin: Clean lashes once daily in the evening. This removes the day’s buildup and keeps your lashes fresh overnight.
Oily Skin: Clean lashes twice daily—morning and evening. If you have oily skin, excess sebum breaks down adhesive faster, so staying on top of cleansing is crucial. Many of my Stonebridge and Evergreen clients with oily skin see a dramatic improvement in retention when they switch to twice-daily cleansing.
Active Lifestyle: If you’ve been sweating—whether from a workout, hot yoga, or shovelling snow in a Saskatoon blizzard—clean your lashes afterward. Sweat contains salt and oils that can weaken the adhesive bond.
Common Face Washing Mistakes with Lash Extensions
After thousands of refill appointments, I’ve identified the most common mistakes my clients make when it comes to cleansing. Avoid these, and your lashes will thank you:
Mistake #1: Avoiding Water Entirely
This is by far the most common mistake. Many clients think keeping their lashes completely dry will help them last longer. The opposite is true. Dry, uncleaned lashes accumulate debris that breaks down the adhesive from the inside out.
Mistake #2: Using Cotton Pads or Balls
Cotton fibres snag on lash extensions and pull them out. Switch to lint-free pads, microfibre cloths, or your clean fingertips.
Mistake #3: Rubbing Eyes with a Towel
We’ve all done it—grabbing a towel and rubbing our face dry out of habit. With lash extensions, this is a guaranteed way to lose lashes prematurely. Pat gently, always.
Mistake #4: Using the Wrong Products
Oil-based products are the biggest culprit. Even products labeled “gentle” or “natural” can contain oils that weaken lash adhesive. Always check the ingredients before using anything near your eyes. If you’re unsure, bring your products to your next appointment and I’ll check them for you!
Mistake #5: Skipping the Lash Line
Cleaning your cheeks and forehead but avoiding the lash line defeats the purpose. The lash line is where oil and debris accumulate most—it’s the area that needs the most attention.
What About Showering with Lash Extensions?
Yes, you can absolutely shower with lash extensions! Just keep these tips in mind:
- Avoid direct water pressure on your lashes (don’t stand directly under the shower head with your face up)
- Use lukewarm water, not hot—especially in the first 48 hours after your appointment
- Pat dry gently after your shower
- Brush with a spoolie once your lashes are dry
During Saskatchewan’s harsh winters, many of my clients take longer, steamier showers. Just be mindful that excessive steam can loosen the adhesive bond over time. A few minutes of steam is perfectly fine—a 30-minute steam session is pushing it.
The Cleansing Change That Transformed My Client’s Retention
One of my favourite success stories is a regular client from Nutana who struggled with retention for months. She was coming in every 2 weeks for refills because she was losing lashes so quickly. We tried different adhesives, different curl types, even different lengths—nothing helped.
Then we sat down and talked about her cleansing routine. It turned out she was using a popular micellar water to “clean” her lashes by swiping it across with a cotton pad. Two problems: the micellar water contained glycols that were slowly dissolving her adhesive, and the cotton pad was physically pulling extensions off.
We switched her to a proper lash-extension foaming cleanser with a soft cleansing brush, and the results were dramatic. At her next refill (3 weeks later), she still had about 75% of her lashes—a huge improvement. She now stretches her refills to every 3-4 weeks comfortably.
The lesson: Sometimes the smallest change in your cleansing routine makes the biggest difference in how long your lash extensions last.
Your Daily Lash Cleansing Checklist
Here’s a quick reference you can screenshot and save:
- Remove eye makeup with oil-free remover (if applicable)
- Wet face with lukewarm water
- Apply oil-free foaming cleanser
- Gently clean lash line with fingertip or soft brush
- Stroke downward along lashes (base to tips)
- Rinse thoroughly with lukewarm water
- Pat dry with lint-free towel (never rub!)
- Brush lashes with clean spoolie once dry
That’s it—the whole routine takes less than 2 minutes. Such a small investment of time for lashes that look better and last weeks longer.
Ready to get eyelash extensions that stay gorgeous between refills? Check out our lash extension pricing in Saskatoon or read the complete aftercare guide for more care tips. If you’re a first-timer, start with our new client guide to know exactly what to expect.
Book your lash extension appointment at Étoile Lash Studio in Saskatoon today, and I’ll personally walk you through the perfect cleansing routine for your skin type and lash style!
✨ Why Choose Étoile Lash for Expert Lash Care?
- 🧼 Detailed Aftercare Education at Every Appointment
- 📐 5+ Years Experience with Lash Extension Care
- 💧 Personalized Cleansing Tips for Your Skin Type
- 🛏️ Comfortable Studio in Saskatoon
- ✅ Certified Lash Technician
- 🅿️ Easy Parking & Flexible Scheduling
FAQs About Washing Your Face with Lash Extensions in Saskatoon
Can I wash my face normally with lash extensions?
How often should I clean my lash extensions?
What cleanser should I use with lash extensions?
Will washing my face make my lash extensions fall out faster?
💧 Ready for Lashes That Last?
Want lash extensions that look gorgeous and last longer? Book your appointment at Étoile Lash Studio in Saskatoon, and I'll teach you the perfect cleansing routine for your lash style!
Let's keep your lashes lasting— Text us at (343) 777-2136 or book online .
Prefer DMs? Message us on Instagram @etoile_lashstudio or Facebook @etoilelash with your lash care questions, and I'll recommend the best cleansing routine for your skin type!
Follow us on Instagram @etoile_lashstudio for daily lash care tips and client transformations!